fMRI Protocol Pages
The final stage of the functional prescription is to set up the timing components of the fMRI run, including the triggering of the scan and/or stimulus presentation.
By selecting Functional Scan from the Scanning Page you access the fMRI protocol planner menus which consist of four sub-menus labelled Triggers, Cycles, File and Gated.
These sub-menus work together with the gating box (black box with large yellow button seated below the scanning console) which is linked to the PC. The scanning can be set to trigger the PC to run the stimulus or vice versa, depending on the paradigm being run. Typically, the the scanner would be set to trigger the PC.
From the paradigm determine whether dummy scans are required prior to the task so that the images during the task itself are in steady state. These dummy scans are supported by the Triggers and Cycles menus, and can be incorporated into the Files menu.
A note on Volumes and Cycles
A volume relates to one complete acquisition i.e. if 12 slices were prescribed in the brain, one volume would be one image of all 12 slices. (In single shot EPI this would take place in one TR so the time taken to collect a volume equals a TR). A cycle relates to an ON and OFF epoch of a paradigm, i.e. if the stimulus was set for 30 seconds ON and 30 seconds OFF then each cycle runs for one minute. If the TR for a single shot EPI were set at 3 seconds then you would prescribe 20 volumes each cycle. You then need to determine how many cycles you want the experiment to run for (i.e. the total time of the acquisition). In the previous example if you ran the experiment for 100 volumes the scan would last 5 minutes and during this time there would be 5 sets of stimulus presentation alternating with 5 sets of rest.
Description of fMRI Protocol Pages
Once you have determined the paradigm, choose the sub-menu that best fits the paradigm.
Triggers

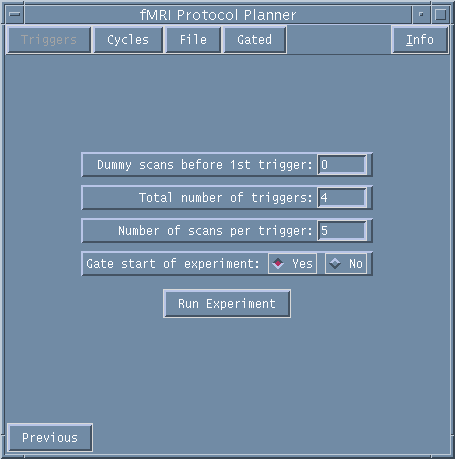
Figure 1. Triggers menu.
The Triggers page should be chosen if the scanner is to be used to trigger the PC at regular intervals. This might be used, for example, for an event- related fMRI design. In these cases a trigger is sent to the PC to start the stimulus. Following each trigger a number of acquisitions will be acquired. Dummy scans can also be played out before the first stimulus trigger.
DUMMY SCANS: From the Trigger sub-menu first add any Dummy scans you require A Scan in this instance refers to a volume. Type in the required number of steady state dummy scans that you require before the first stimulus trigger is played out.
TOTAL NUMBER OF TRIGGERS: Add the number of triggers that will be used.
NUMBER OF SCANS PER TRIGGER: Set the number of volumes that will acquired after each trigger is played out.
GATE START OF EXPERIMENT: Decide if you want the scanner to start the acquisition as soon as it has downloaded the pulse sequence, or on a button press of the gating box. With the left-hand mouse select either Yes or No.
If you are gating the experiment you will also need to press the red button on the separate gating box. Move the control on the right of the box to either "Scanner" or "Computer" depending on which is the Triggering agent.
RUN EXPERIMENT will download the prescription parameters and if you have not gated the experiment will also RUN the experiment. If you have set a gated experiment further prompts will appear in the Varian Window. In those cases, press the yellow button to actually start the experiment.
Cycles

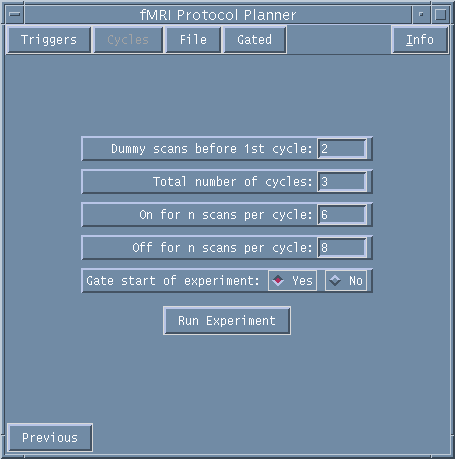
Figure 2. Cycles menu.
This sub-menu could be chosen if the stimulus PC requires an ON signal (high TTL signal) from the scanner and an OFF signal (low TTL signal) from the scanner, in a cyclic pattern.
DUMMY SCANS: From the Trigger sub-menu first add any Dummy scans you require A Scan in this instance refers to a volume. Type in the required number of steady state dummy scans that you require before the first stimulus trigger is played out.
TOTAL NUMBER OF CYCLES: Select how many cycles the experiment will run for. This will determine the length of the experiment.
ON FOR N SCANS PER CYCLE: Select how many scans (volumes) will run during the ON phase of each cycle.
OFF FOR N SCANS PER CYCLE: Select how many scans (volumes) will run for the OFF phase of each cycle.
GATE START OF EXPERIMENT: Decide if you want the scanner to start the acquisition as soon as it has downloaded the pulse sequence, or on a button press of the gating box. With the left-hand mouse select either Yes or No.
If you are gating the experiment you will also need to press the red button on the separate gating box. Move the control on the right of the box to either Scanner or Computer depending on which is the Triggering agent.
RUN EXPERIMENT will download the prescription parameters and if you have not gated the experiment will also RUN the experiment. If you have set a gated experiment further prompts will appear in the Varian Window. In those cases, press the yellow button to actually start the experiment.
File

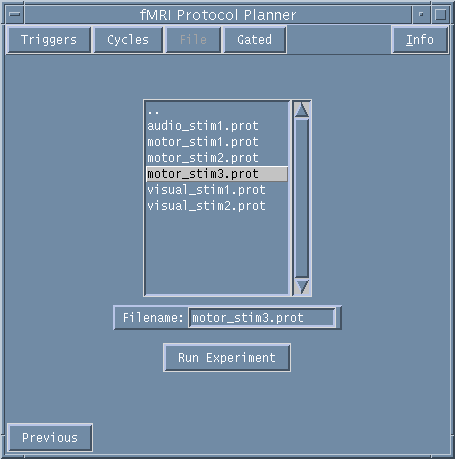
Figure 3. File menu.
This sub-menu allows a more complex experiment to be run from a preset File. Use the scroll bar to find the required file and double click on it with the left-hand mouse. The file name should appear in the Filename window. Press RUN EXPERIMENT to download and run the file.
The file itself is a simple text file. The first line of the file is the word "protlist" which is an error check to make sure that the format is a valid protocol list. Each subsequent line contains a number that indicates what flags are set for the acquisition of each volume. When more than one action is required, the flags should be summed.,/P>
The following flags are supported:
0: Normal EPI acquisition, low TTL trigger signal to PC.
1: Wait for external (yellow button etc.) trigger before acquiring.
2: Output high TTL trigger signal to PC.
4: Blips off (phase correction) EPI acquisition, low TTL signal.
Thus, if a series of acquisitions are required that consist of 5 OFF volumes followed by 5 ON volumes, followed by 4 OFF volumes followed by 6 ON volumes, with a yellow button external trigger at the overall start of the experiment, then the protocol list should look as follows:
protlist
1
0
0
0
0
2
2
2
2
2
0
0
0
0
2
2
2
2
2
2
Gated

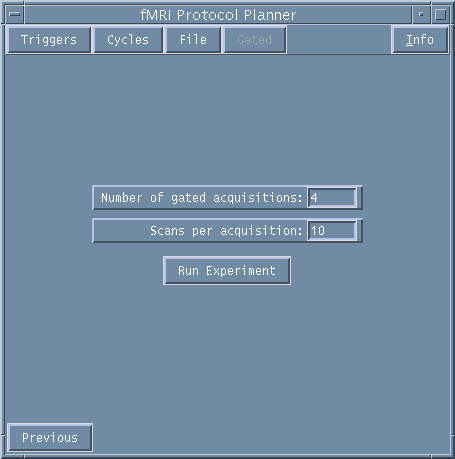
Figure 3. Gated menu.
This sub-menu is used to allow the scanner to be externally gated from the stimulus PC. The scanner will wait for an external gating signal from the stimulus PC and will collect a number of volumes each time it sees a trigger. The external trigger must be provided from the PC, and the gating box must be switched to expect a trigger from the "computer". This approach could be used for event related fMRI experiments where the stimulus computer is providing the trigger.
NUMBER OF GATED ACQUISITIONS: Type in the required number of blocks of acquisitions (the number of triggers that will be provided by the stimulus computer).
SCANS PER ACQUISITION. This determines how may scans (or volumes) are collected following each external trigger. Type in the required number.
RUN EXPERIMENT will download the prescription parameters and run the experiment. As you have set a gated experiment, further prompts will appear in the Varian Window.
NOTE that you should allow enough time for the scanner to collect the requested number of volumes before you issue another trigger from the stimulus computer.
For any externally gated runs, a dialogue box will appear in the Varian window asking to confirm download. Press the return key. The Acquisition Status window will show "Idle", followed by "Active", and eventually "Acquiring". Press the yellow button or start your stimulus experiment when you see the "Acquiring" message.